Key Takeaways
- Identify the full system. Record the cartridge family, nominal ratio, inlet, mixer geometry, outlet, and dispensing method before comparing nozzle part numbers.
- Approve with your own epoxy. Physical fit does not prove seal integrity, acceptable pressure behavior, mixed-bead quality, or cure performance.
- Measure retained material. A scale and a controlled shot sequence give a defensible waste value; a generic chart does not.
- Freeze the approved configuration. Put material, dimensions, element count, color, packaging, and change control on the purchase specification.
- Plan the order path. Haijing’s documented mixer MOQ is 3,000 pieces, while samples are not subject to MOQ and have a 3–7 day lead time.
An epoxy mixing nozzle is cheap compared with the adhesive, labor, and parts that depend on it. Teams often approve a nozzle because it attaches to the cartridge. Leaks, excessive trigger force, streaked material, or a blocked tip appear later on the line.
In short: buy the nozzle as one controlled part of a dispensing system. Confirm the interface on paper, test samples with the actual epoxy and equipment, measure what stays inside the mixer, and freeze the approved configuration before a bulk order.
Start With the Complete Dispensing System
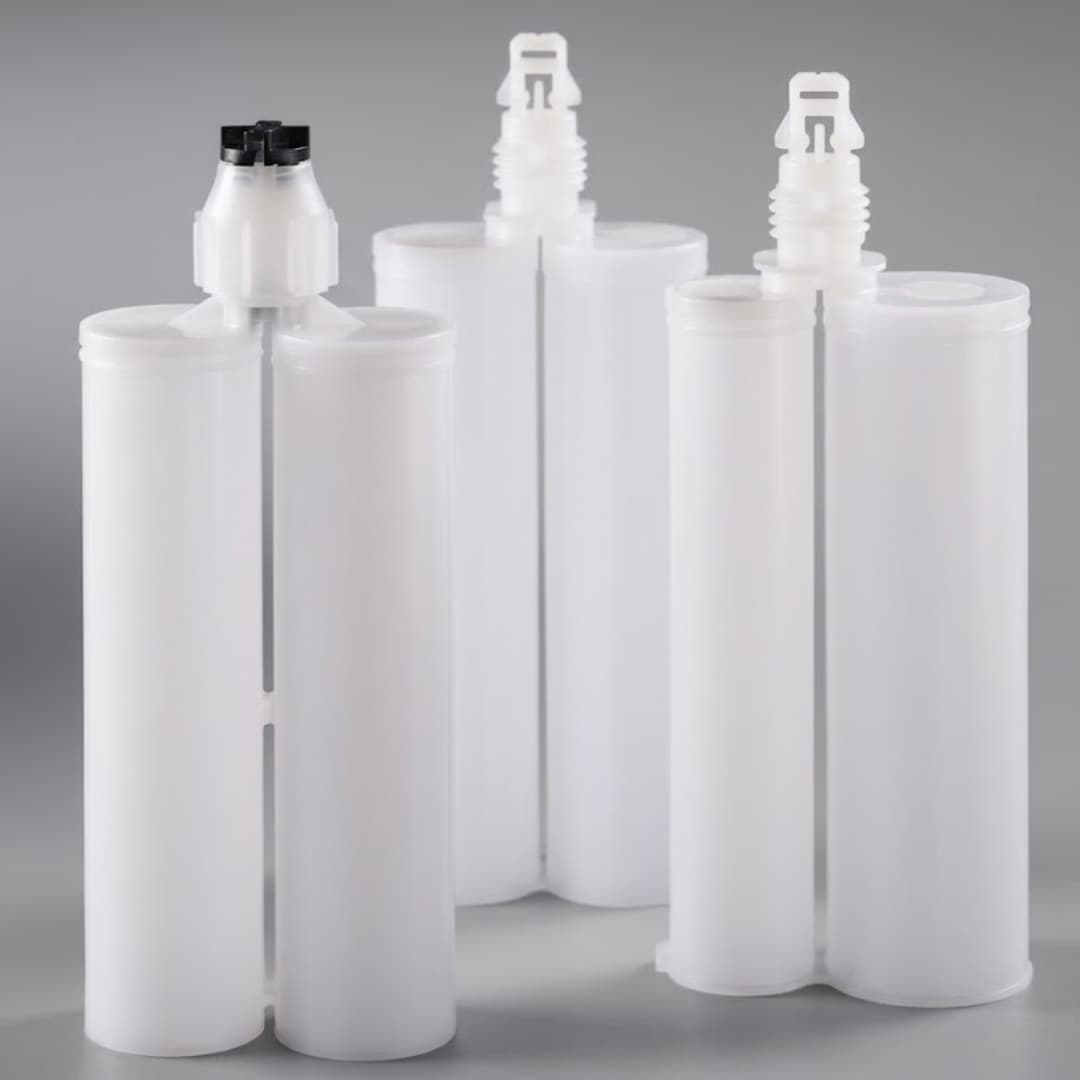
A nozzle does not set the resin-to-hardener ratio by itself. The filled dual cartridge and its paired plungers meter the two components. The inlet then has to receive those streams without leakage or cross-flow, while the internal elements mix them before the material reaches the outlet.
This makes visual matching unreliable. Two tips may share the same color and approximate length yet use different inlet geometry, element count, bore, or outlet. A part that clicks into place can still be the wrong controlled component for the approved process.

Record these fields before asking any supplier for an equivalent:
- Cartridge identity — volume, family, outlet layout, manufacturer drawing, and filled product code.
- Nominal mix ratio — state whether the formulation ratio is controlled by volume or weight.
- Dispense method — manual, pneumatic, electric, or automated equipment changes the operating context.
- Mixer definition — inlet, internal geometry, bore, element count, length, material, and outlet.
- Process conditions — adhesive grade, component temperature, expected flow, shot pattern, and pause time.
Treat that list as the system identity. If one field is unknown, request a drawing or submit the current cartridge and nozzle as physical references. Guessing from a marketplace photo shifts the compatibility risk back to your production line.
Procurement position: a claimed cross-reference is only a candidate until it passes your sample record. The approved record, not the supplier’s phrase “universal fit,” should release the bulk purchase.
Match Cartridge Ratio and Inlet
Start with the cartridge family because it eliminates most wrong options quickly. Haijing’s documented range uses four mixer systems across cartridge sizes from 50 ml through 600 ml. Each system combines an inlet architecture with a defined group of cartridge sizes and ratios.
The table is a supplier-range map, not a universal industry compatibility chart. Use it to narrow the sample request, then confirm the actual cartridge drawing. A ratio label alone cannot prove that the inlet ports, seal faces, and locking features match.
| System | Documented Interface | Cartridge Sizes | Available Ratios |
|---|---|---|---|
| A-System | Bayonet twist-and-lock connection | 50 ml | 1:1, 2:1, 4:1 |
| B-System | Separate component outlets before mixing | 50, 75, 100 ml | 1:1, 2:1, 4:1, 10:1 |
| C-System | Bell/Thread threaded connection for high-pressure use; confirm the cartridge drawing | 200, 400, 600 ml | 1:1, 2:1, 4:1, 10:1 |
| F-System | Quick lock with positive stop | 200, 400 ml | 1:1, 2:1, 4:1, 10:1 |
Separate component paths can matter when materials must remain isolated until they enter the mixer. The B-System uses two independent outlets before the mixing section. That feature is worth specifying when premature contact at the cartridge nose is a known risk.
Do not use the nozzle to “correct” a cartridge ratio. Confirm the filled cartridge, plunger set, and gun first. If those parts do not meter the formula’s required volumetric ratio, changing the mixer cannot repair the dosing error.
Choose Geometry Material and Outlet
Once the inlet is fixed, compare the mixing section. Helical and square-element designs create different flow paths, but neither geometry wins every epoxy application. The defensible choice is the shortest, lowest-retention candidate that still produces an acceptable mixed bead across the planned operating window.
Element count and bore belong on the drawing. They influence mixing opportunities, retained volume, and resistance to flow. A longer mixer can add mixing stages while holding more adhesive; a narrower path can change pressure behavior. These are test variables, not marketing badges.
Read the adhesive data sheet before selecting those variables. Record each component’s viscosity at the intended operating temperature, not a room-temperature guess. If resin and hardener differ sharply, ask for more than one bore or geometry candidate and test them under the same dispense rate.
Pressure evidence must come from the actual tool or machine. For a manual tool, record whether the approved shot can be completed smoothly without abnormal handle force or cartridge movement. For pneumatic or automated equipment, log the available pressure signal or machine load and compare it with the equipment maker’s limit.
Use a fixed decision order: seal and fit, mixed-bead acceptance, cure result, tool or machine behavior, retained material, then outlet performance. A low-waste nozzle that overloads the dispenser or fails the cure check is not an acceptable trade.
Material is another controlled field. Haijing documents PP as the standard mixer material and offers PA or PBT customization for selected configurations. The adhesive manufacturer or a documented compatibility review should confirm the resin choice; color alone says nothing about polymer identity.
| Field | Buying Question | Approval Evidence |
|---|---|---|
| Internal geometry | Does the bead mix across the process window? | Mixed-bead and cure checks |
| Bore and length | Is flow stable without excessive resistance? | Pressure or tool-force record |
| Material | Will the polymer tolerate both components? | Compatibility statement and exposure test |
| Outlet | Does the tip create the required bead? | Bead dimensions and application trial |
| Color | Does it prevent line-side mix-ups? | Approved visual standard |
Haijing’s standard options include stepped outlets and Luer Lock outlets that accept dispensing needles. Specify the downstream attachment and bead requirement before freezing the tip. An outlet chosen after sample approval can invalidate the flow and waste results you already recorded.
For Automated Dispensing Lines
Run the candidate on the intended machine cycle. Include the programmed dispense rate, path corners, starts, stops, maximum normal pause, and restart sequence. Record shot mass or bead dimensions with the machine’s pressure or load trend so a later drift has a baseline.
The outlet also changes the robot setup. Freeze the tip geometry, standoff, path speed, and bead acceptance together. Switching only the nozzle after approval can change bead placement even when the inlet and internal mixer still fit.
Need a Nozzle Sample for Validation?
Send the cartridge family, mix ratio, adhesive data, dispense method, and required outlet with the sample request. Samples sit outside the 3,000-piece MOQ; run compatibility and waste checks under your own approval method.
Documented options | A, B, C, and F systems | PP, PA, or PBT configurations
Measure Waste Instead of Guessing
Nozzle waste has more than one component. Material remains inside the mixer after the last useful shot. A fresh nozzle may also need a startup purge, and a pause beyond the adhesive’s workable time can force an early change. Count all three under the same validation rule.
Use mass when the geometry makes volume hard to measure. Weigh the unused nozzle, run the defined dispense sequence, remove external drips, then weigh it again. The difference is retained mixed material for that trial. Repeat the sequence with the same adhesive temperature, cartridge, gun settings, shot count, and pause pattern.
| Sample Approval Field | Unit or Evidence | Recorded Result |
|---|---|---|
| Adhesive code and lot | Label or certificate | |
| Component temperatures | Buyer-selected unit | |
| Cartridge and nozzle codes | Drawing and labels | |
| Tool or machine settings | Named settings | |
| Dispense rate and pattern | Buyer-selected unit | |
| Planned pause | Time | |
| Restart force or pressure | Tool or machine signal | |
| Startup purge mass | Mass | |
| Retained mass | Used minus unused mass | |
| Bead and cure result | Named inspection method | |
| Approval identity | Approver and date | |
| Retained sample ID | Storage label |
For each line, record the evidence and mark pass, fail, hold, or unavailable. The named approver signs the final release or rejection.
Annual waste mass = retained mass per change × changes per year + purge mass per start × starts per year.
Count scheduled changeovers and pause-triggered early replacements in “changes per year.” Leave all four inputs blank until the trial and production plan supply them. Keep adhesive price outside the technical worksheet so purchasing can update cost without rewriting the validation.
Do not reward the smallest retained mass if the mixer produces streaks or unstable cure. Mixing acceptance comes first. Among candidates that pass, choose the one with the lower measured burden and simpler line-side control.
Control Clogging Pauses and Changeovers
Mixed epoxy begins its cure inside the nozzle as well as on the part. Use the adhesive maker’s working-time data as a boundary, then validate a shorter line-side pause limit with the actual mixer and operating temperature. Do not invent a universal number of minutes.
Build the restart test into sample approval. After the planned pause, record the initial tool force or machine pressure, startup purge, bead appearance, and cure result. Replace the nozzle when any restart result falls outside the approved rule, even if material still exits the tip.
Do not assume a used mixer nozzle remains suitable after a pause. Mixed epoxy remains on the internal elements even when the outlet looks clean. Reuse only under a written procedure that names the adhesive, operating temperature, maximum pause, restart check, and replacement trigger.
Put four items on the line-side changeover instruction:
- Maximum approved pause — tie it to the named adhesive, mixer, and operating temperature.
- Restart check — define acceptable pressure or force, purge, bead appearance, and cure evidence.
- Replacement trigger — change the nozzle when any approved restart condition is missed.
- Traceability field — record nozzle code, lot, installation time, removal time, and reason.
Approve Samples With a Test Record
An epoxy mixing nozzle sample test should reproduce the most difficult normal condition, not the easiest bench shot. Include the lowest expected component temperature, the longest planned pause, and the fastest required dispense rate if those conditions are part of production. Use the actual filled cartridge and production-equivalent gun or machine.
Haijing’s documented policy does not apply the 3,000-piece mixer MOQ to samples. The buyer pays the sample and freight fees, and the documented sample lead time is 3–7 days. Use that window to request more than one controlled candidate when geometry or outlet remains open.
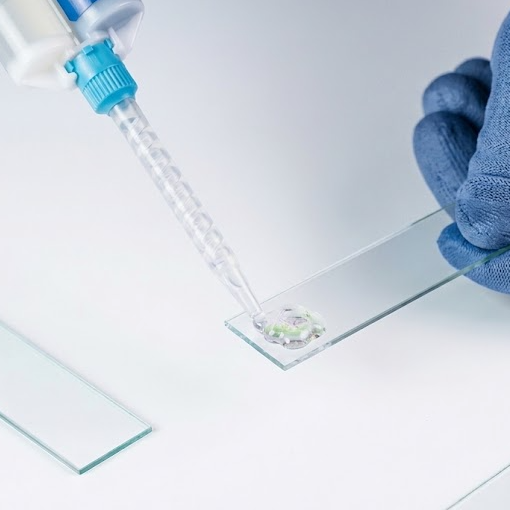
Run the sample approval in this order:
- Verify before installation — compare the label, drawing, molded code, material, color, and outlet; confirm a clean outlet, intact seals, open component paths, and the correct inlet.
- Install by instruction — align the documented inlet and seals, then lock without improvised force.
- Purge to the project rule — collect startup material until the prewritten bead criterion passes; do not assume a universal quantity.
- Run the shot pattern — include production shots, starts, stops, and the planned pause.
- Inspect the result — assess bead consistency, mixed appearance, cure, blockage, and retained mass.
- Sign the record — identify the approved nozzle, adhesive, cartridge, tool settings, and test date.
Write the pass/fail rule before testing. “Looks good” cannot settle a disagreement between engineering and purchasing. Require no inlet leak, no visible unmixed streak, acceptable tool behavior, and a cured sample that meets the adhesive maker’s test method. Set a project limit for retained mass.
Keep an approved physical sample with the signed record when storage permits. That reference helps incoming inspection catch a changed outlet, color, length, or molded marking before the new lot reaches production.
Freeze the Approved Bulk Order Specification
Turn the approved sample into a purchase specification. Haijing model codes can encode series, diameter, element count, outlet type, and color; BH-5.4-16-T-GY is one documented naming example. A model code helps, but the controlled drawing remains the clearer source when custom features are involved.
List every field that could change fit, mixing, flow, identification, or handling. Include polymer, inlet geometry, seal features, internal geometry, element count, total length, outlet, color, markings, bag quantity, carton label, and lot code. Attach the approved drawing and sample record to the purchase order.
Change-control rule: require written approval before a supplier changes tooling, polymer, colorant, internal geometry, dimensions, sub-supplier, packaging, or inspection method. “Equivalent” is not a release category.
Ask for the documents that matter to your risk. Haijing can provide test reports, first article inspection reports, STEP or IGES models, and chemical-compatibility tables. A drawing supports dimensional inspection; a compatibility table informs material review; neither replaces your adhesive and process trial.
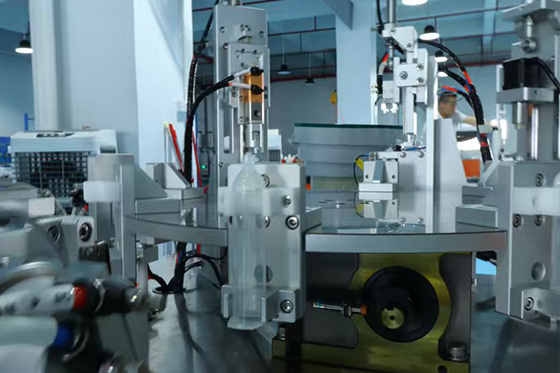
ISO 9001 certification describes a supplier’s quality management system, not automatic product fitness. Haijing documents an ISO 9001:2015-certified facility, and the ISO 9001:2015 project page confirms that scope. Your purchase specification still has to define the product.
Plan MOQ Lead Time and Inspection
Commercial terms should match the epoxy mixing nozzle validation sequence. Haijing’s documented standard MOQ for static mixers is 3,000 pieces. Samples sit outside that MOQ, so the sensible order is sample approval first, then tooling or artwork approval where needed, then the bulk release.
The documented lead-time bands are one week below 10,000 pieces and two weeks from 10,000 through 50,000 pieces. Orders above 50,000 pieces have a documented three-week band. Confirm the date on the quotation for the exact configuration and packaging.
| Order Stage | Documented Timing | Release Evidence |
|---|---|---|
| Engineering samples | 3–7 days | Signed sample test record |
| Bulk below 10,000 | 1 week | Approved specification and order |
| Bulk 10,000–50,000 | 2 weeks | Approved specification and order |
| Bulk above 50,000 | 3 weeks | Approved specification and order |
Incoming inspection should start with identity, packaging, and a drawing check. Follow with fit and functional sampling under the approved method. Quarantine the lot if the molded code, material declaration, inlet, length, outlet, or packaging differs from the frozen record.
| Incoming Check | Reference | Finding | Disposition |
|---|---|---|---|
| Sampling scope | Buyer-approved sampling plan | Proceed or hold | |
| Identity and drawing revision | Purchase specification | Match or quarantine | |
| Lot and packaging | Released label and packing standard | Match or quarantine | |
| Controlled dimensions | Released drawing | Pass or fail | |
| Material declaration | Approved polymer | Match or quarantine | |
| Fit and function sample | Approved test method | Pass or fail | |
| Defect class and decision | Buyer acceptance rule | Accept, quarantine, or reject | |
| Change escalation | Written change-control rule | Approve or reject the change |
Custom element counts, lengths, materials, or outlets may need their own first article release. Do not blend a custom revision into a repeat order simply because the base series name is unchanged. Give the revision a unique drawing or model suffix.
Use This RFQ and Acceptance Checklist
A complete request for quotation reduces clarification cycles and gives suppliers the same comparison basis. Copy the fields below into the RFQ. If a value is unknown, label it “supplier to propose and validate” instead of leaving it blank.
The RFQ should contain:
- Adhesive — chemistry, product code, component viscosities, mix ratio basis, and safety data sheets.
- Cartridge — family, volume, outlet drawing, filled-product code, and planned gun or machine.
- Process — component temperature, dispense rate, shot size, bead target, and maximum pause.
- Nozzle — inlet, geometry, bore, elements, length, material, outlet, color, and markings.
- Commercial scope — sample quantity, annual demand, order lot, packaging, and delivery destination.
- Quality scope — drawing, FAI, test report, compatibility documents, lot code, and change control.
Release a candidate only when the paper definition and physical test agree. Correct the specification if the drawing is wrong. Correct the process if the approved nozzle cannot reproduce the result. Reject the candidate if it cannot meet a prewritten acceptance rule under normal operating conditions.
For a wider engineering view of nozzle families, read the static mixing nozzle engineering guide. Use the PP, PA, and PBT comparison when polymer choice is still open, then route the approved specification to the static and dynamic mixer product range.
Why We Write This
Haijing manufactures static mixers in a 20,000 sqm ISO 9001-certified facility with more than 60 precision injection-molding machines. Documented annual static-mixer capacity exceeds 85 million pieces. Scale makes a controlled specification more important because one ambiguous field can repeat across a large lot.
Our position is simple: no universal selection table can approve an epoxy mixing nozzle for every adhesive and process. The Permabond Nozzle Guide shows different diameters, lengths, element counts, and internal volumes across epoxy and polyurethane configurations. The buyer still needs a sample test tied to the actual system.
If you are preparing an RFQ, send Haijing the cartridge drawing, ratio, adhesive data, dispense method, and outlet requirement. Samples sit outside the 3,000-piece MOQ, carry sample and freight fees, and have a documented 3–7 day lead time. Use them in your own validation plan.
References: ISO 9001:2015 project page; Permabond Nozzle Guide; Haijing Static and Dynamic Mixers.
The upstream tool also needs approval: this adhesive dispensing gun guide connects cartridge format, ratio, force, and drive to the mixer trial.
The upstream tool also needs approval: the dual-cartridge epoxy gun selection guide connects the cartridge ratio and plunger geometry to the approved mixer trial.
If the existing nozzle is known only by a catalog code, the static mixer part-number guide shows how to build a drawing-based cross-reference before sample and bulk-order approval.
Nozzle approval starts with the package that feeds it. The empty cartridge release guide explains how to qualify material, closure, filling, storage, samples, and bulk purchase evidence before finalizing the dispensing stack.
If a qualified cartridge-and-mixer stack later produces leakage, startup lag, streaks, or soft cure, follow the 2K cartridge supplier-claim workflow before changing several variables at once.
After the candidate is selected, use the mixing nozzle production qualification test to verify dry fit, preflow, startup, steady output, pause-restart behavior, and cure before bulk release.
Frequently Asked Questions
How do I choose an epoxy mixing nozzle?
Match the cartridge family, nominal ratio, inlet, mixer geometry, outlet, and verified adhesive compatibility. Approve the final candidate with the actual cartridge, epoxy, dispensing tool, and process conditions.
Can one mixing nozzle fit every two-part epoxy cartridge?
No. Physical attachment does not prove that the ratio ports, seal faces, mixing section, or outlet suit the cartridge and process. Treat any cross-reference as a sample candidate.
How should I compare epoxy waste between nozzles?
Weigh retained and startup-purge material under the same adhesive temperature, cartridge, dispense settings, shot sequence, and pause time. Compare only candidates that also pass mixing and cure checks.
Can I order samples before the MOQ?
Yes. Haijing samples are not subject to the 3,000-piece mixer MOQ. The buyer pays sample and freight fees, and the documented sample lead time is 3–7 days.
Can I reuse an epoxy mixing nozzle after a pause?
Only under a validated written procedure. Name the adhesive, temperature, maximum pause, restart force or pressure, bead criterion, and cure check. Replace the nozzle when any restart result falls outside that rule.
What belongs in a bulk mixing-nozzle specification?
Specify cartridge family, ratio, inlet, geometry, bore, element count, length, material, outlet, color, markings, packaging, inspection documents, lot identification, and written change-control requirements.
Before choosing mixer geometry, confirm that the application actually needs mixing rather than only placement control. See the adhesive dispensing nozzle versus mixing nozzle guide for the function-first decision.
Before asking for a part number, complete the resin static mixer selection record with package, separate component viscosities, working life and filler notes.