An adhesive dispensing gun should never be the first item selected in a two-component dispensing stack. Start with the cartridge system, volume, and volumetric ratio. Only then should you choose the drive and prove that the available force can move the actual adhesive through the actual mixer.
Key Takeaways
- Package first. Cartridge system, volume, ratio, flange, and retainer geometry are hard compatibility constraints.
- Ratio is mechanical. The gun must carry the correct paired plunger geometry for the cartridge’s volumetric ratio.
- Thrust needs evidence. A thrust ratio is not a viscosity rating. Confirm output force and run a material-loaded test.
- Drive follows the process. Manual, pneumatic, and electric tools solve different problems in mobility, repetition, and control.
- Approve a complete stack. Freeze the gun, cartridge, piston, mixer, adhesive, and operating conditions in one record.
In short: choose the applicator from the package outward. A gun that accepts a cartridge but uses the wrong plunger set, retainer, or force class is not compatible. This guide gives engineers and buyers a practical way to specify, sample, and release the tool without relying on a product photo.
Define the Package Before the Tool
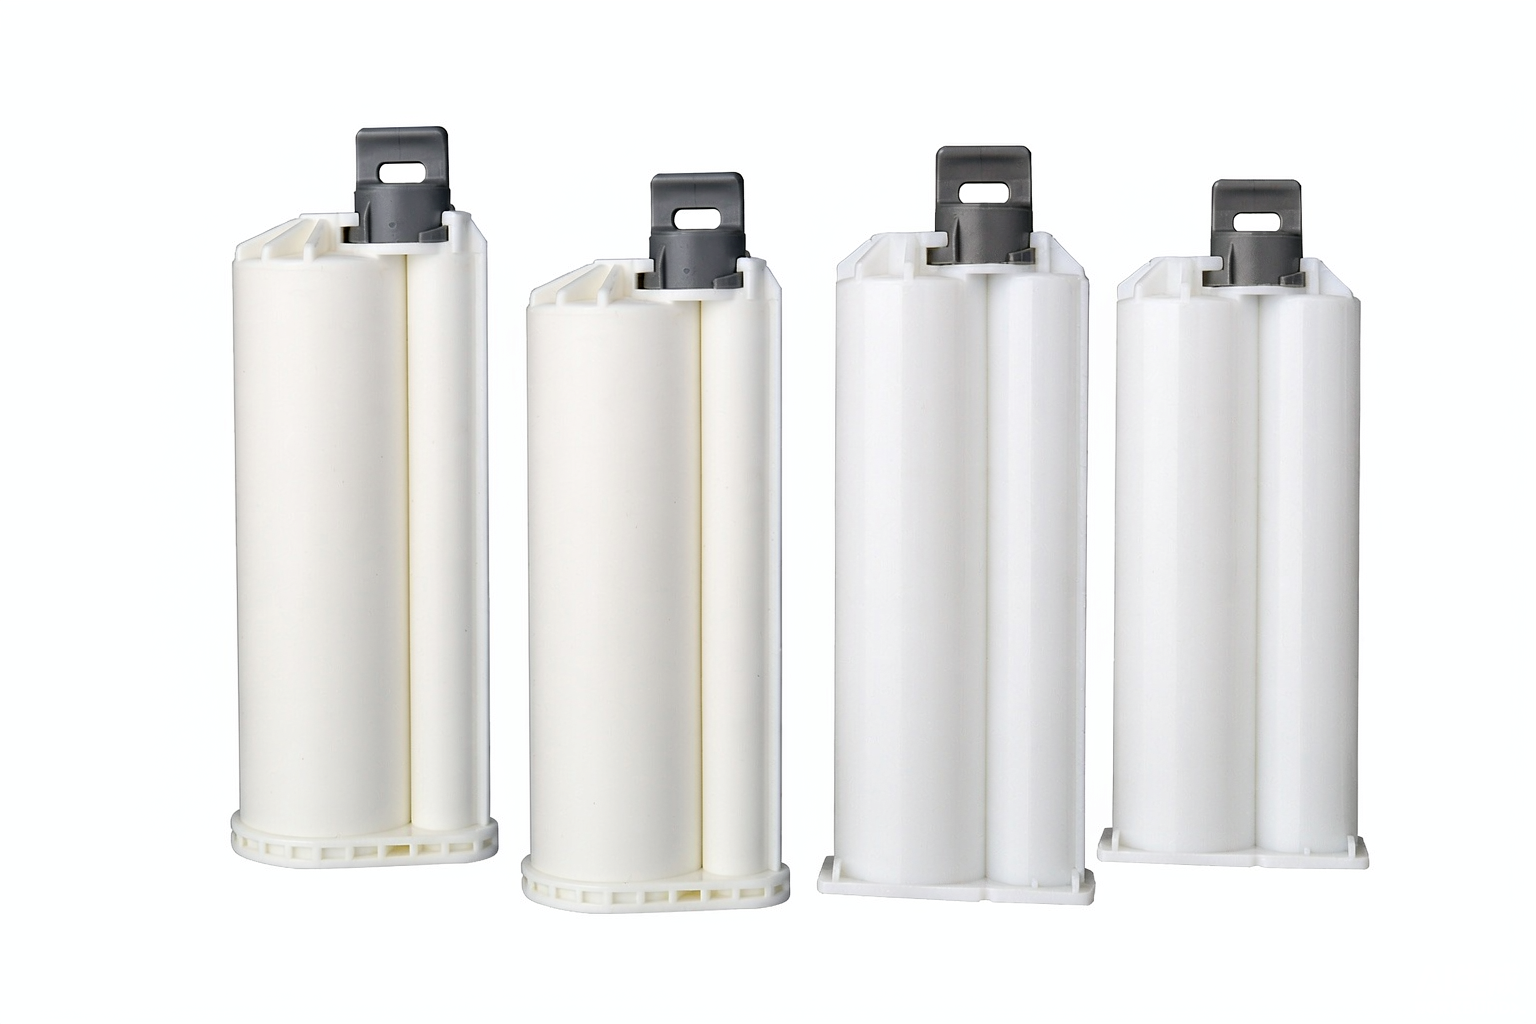
The phrase “dispensing gun” covers several tools that do not share a common package. A single-component cartridge uses one piston and one outlet. A dual-component cartridge uses paired chambers, paired pistons, and two outlets that feed a static mixer. A tool built for one arrangement cannot be approved for the other by adding an adapter at the tip.
For a two-component adhesive, the gun’s job is narrower than many catalogs imply. It advances both cartridge pistons with the travel relationship required by the package. The cartridge chamber geometry meters the two components by volume, while the static mixer blends them after they leave the outlets. The gun supplies motion and force; it does not correct the formulation ratio or cure chemistry. The dual-component cartridge sizing and ratio guide explains those package constraints in more detail.
Write down the package identity before contacting a supplier. “Two-part epoxy, 400 ml” is incomplete because different systems can use different flanges, retainers, outlet layouts, and plunger arrangements. A photo can support identification, but it cannot replace dimensions, model codes, and a sample fit check.
| Selection Field | What to Record | Why It Is a Hard Constraint |
|---|---|---|
| Package type | 1K or 2K cartridge | Determines one or two plunger paths |
| System | Cartridge family and flange | Controls carriage and retainer fit |
| Volume | Filled nominal volume | Sets frame length and piston travel |
| Ratio | Volumetric mix ratio | Sets paired plunger geometry |
| Outlet | Port layout and mixer interface | Controls mixer connection and flow path |
The fastest rejection rule is simple: if the supplier cannot identify all five fields, do not approve the gun. Move the project back to package identification. A short delay here prevents a far more expensive discovery after cartridges, guns, and mixers arrive from separate purchase orders.
Match Cartridge Format and Volume
Volume labels are useful for inventory, but they are not universal mechanical standards. Two cartridges can carry the same nominal volume and still differ at the flange, barrel spacing, outlet face, or piston shape. The gun frame must support the cartridge without twisting it, and each push rod must land squarely on its piston.
Haijing’s published manual-gun range illustrates why a system code matters. The A-System includes ratio-specific models for small dual cartridges. The C- and F-System range covers larger formats, with selected models shared across the two systems only where the product specification says so. That parenthetical approval matters; buyers should not infer cross-system fit from a similar outline.

| Published Model | System or Format | Published Ratio | Release Note |
|---|---|---|---|
| A-DM50-11-05-STD | A-System 50 ml | 1:1 | Confirm exact cartridge code |
| A-DM50-11/21-01-STD | A-System 50 ml | 1:1 or 2:1 | Confirm installed plunger set |
| A-DM50-41-01-STD | A-System 50 ml | 4:1 | Ratio-specific configuration |
| A-DM45-101-01-STD | A-System small format | 10:1 | Confirm cartridge and piston geometry |
| C-DM200-11-01-STD | C/F-System 200 ml | 1:1 | Shared use is published |
| C-DM400-11-05-STD | C/F-System 400 ml | 1:1 | Shared use is published |
| F-DM400-21-01-STD | C/F-System 400 ml | 2:1 | Shared use is published |
Use model codes as controlled identifiers, not as substitutes for a fit trial. Record the cartridge code, gun code, fitted retainer, and plunger set on the same sample sheet. If any component changes, reopen the approval. A supplier substitution that keeps only the ratio and volume unchanged can still alter alignment or support.
Inspect the empty fit before loading adhesive:
- Seating. The cartridge rests fully in the frame without rocking or forced closure.
- Plunger contact. Each push rod meets the piston face squarely and at the same starting position.
- Retainer security. The flange cannot lift, rotate, or move forward under hand pressure.
- Travel clearance. The rods can complete the required stroke without contacting the frame.
- Mixer access. The installed cartridge outlet accepts the approved mixer without interference from the gun.
Match the Volumetric Mix Ratio
A dual cartridge meters by volume. The adhesive technical data sheet may also state a ratio by weight, and the two numbers need not match because the components can have different densities. Specify the gun from the cartridge’s volumetric ratio and chamber geometry, not from a weight ratio copied from the formulation sheet.
In a 1:1 package, equal piston travel acts on equal chamber areas. A 2:1 or 4:1 package uses different chamber areas, a ratio-specific plunger arrangement, or both. Equal rod travel can still dispense unequal volumes by design. That is why replacing a plunger plate or conversion part without a controlled part number can create off-ratio output even when the cartridge sits in the frame.
The approved ratios in Haijing’s current published range include 1:1, 2:1, 4:1, and 10:1 configurations. That list describes available systems, not a promise that one gun body covers every ratio. The exact model and installed parts decide compatibility.
During the first material trial, remove the mixer only if the adhesive maker’s procedure permits it, then verify that both components reach the outlets. Reinstall a new approved mixer and purge according to the adhesive instructions. Streaks, unusual color, soft cure, or one piston lagging are stop signals, not reasons to squeeze harder.
Treat Thrust as a Verified Requirement
Thrust ratio is mechanical advantage, not a direct promise of usable output under every condition. One supplier may publish a mechanical ratio while another states output force in newtons or pounds-force. Buyers should not compare those fields as if they were the same measurement.
The required force changes with the complete flow path. Adhesive viscosity rises or falls with temperature, the cartridge piston and seals add friction, and the mixer adds resistance. A smaller outlet or longer mixing path can increase the force needed at the same desired bead rate. None of these variables can be collapsed into one universal “high viscosity” label.
Ask for evidence in layers. Start with the gun maker’s rated output or mechanical data. Add the adhesive data sheet and the mixer specification. Finish with a trial at the coldest and warmest approved material conditions for the process, using the actual bead or shot requirement.
Build the force decision from five evidence layers:
- Gun mechanical data screens the drive and model for available output.
- Adhesive data defines the material conditions that must be tested.
- Cartridge specifications protect the package and seals from an unsuitable load.
- Mixer specifications freeze the geometry that adds flow resistance.
- A material-loaded trial supplies the final release evidence for the complete stack.
A gun that stalls is not always underpowered. A cured plug, unopened outlet, misaligned piston, cold cartridge, or damaged seal can create the same symptom. Raising force before finding the restriction can split a cartridge or eject the mixer. Diagnose the path first.
Choose Manual, Pneumatic, or Electric
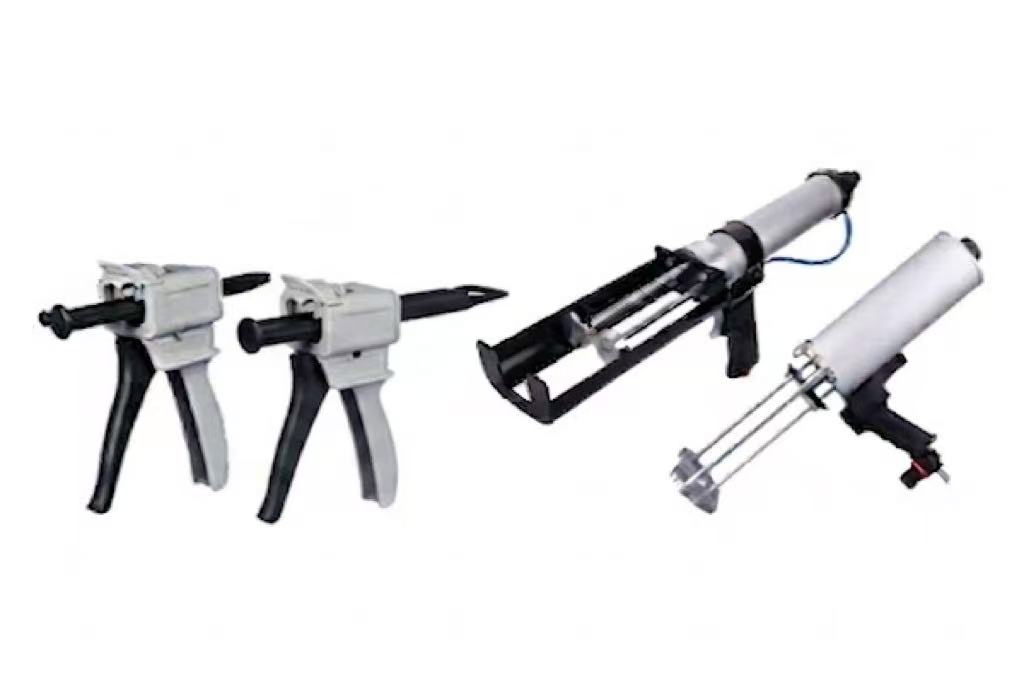
Drive choice should follow the work pattern. Manual guns make sense when the operator needs portability, the shot count is modest, and the material can be moved without excessive hand effort. Pneumatic guns remove repeated trigger effort and can support steadier cycles, but they need controlled compressed air and a suitable workstation. Electric tools add powered drive without an air line, with performance defined by the exact model and control system.
No drive wins every job. A manual tool is the cleaner choice for field repair if air and charging access are uncertain. A pneumatic model is the stronger production choice when a regulated air supply already exists and the process repeats all shift. An electric gun is worth evaluating when mobility and powered extrusion are both required.

Use the process constraint to narrow the drive:
- Work away from utilities: favor manual drive, or an electric tool with a proven charge plan.
- Repeated long beads: evaluate pneumatic drive first; check manual fatigue and electric duty cycle.
- Controlled plant air: pneumatic drive becomes practical without changing a portable job into a tethered one.
- Variable work locations: manual and electric tools preserve mobility; an air line limits movement.
- Exact flow automation: move beyond a handheld gun and validate the full metering and motion system.
Haijing publishes pneumatic A- and B-System configurations with a G1/8 inlet and a documented compressed-air range of 0.4 to 0.7 MPa. Treat those values as model-family facts, not settings to copy onto another gun. The operating pressure must stay inside the selected tool’s data and the approved limits of the cartridge and mixer.
If the project needs programmed shots, digital traceability, or robot integration, a handheld gun may be the wrong architecture. Review the broader adhesive dispensing systems selection guide before forcing a manual tool into an automated job. For assembly-line tradeoffs, compare manual and pneumatic dispensing guns against the actual cycle.
Check the Complete Dispensing Stack
The gun, cartridge, piston, outlet, and static mixer form one mechanical chain. The adhesive adds the load. Changing any link can change seating, required force, purge behavior, retained material, or restart performance. Procurement systems often split these items into separate line items, which hides the dependency during approval. The epoxy mixing nozzle buying guide covers the downstream mixer decision.
Give the complete stack one configuration ID. Record the gun code, cartridge code, ratio, piston, mixer code, adhesive batch, and test temperature. The configuration ID belongs on the sample report and purchase specification. A later buyer can then see whether a proposed substitute is truly equivalent or merely similar.
Freeze these interfaces in the order material meets them:
- Push mechanism. Confirm rod count, plunger geometry, alignment, and release behavior.
- Cartridge support. Confirm volume, chamber layout, flange, retainer, and full travel.
- Outlet face. Confirm port separation, seal condition, cap removal, and mixer connection.
- Static mixer. Confirm inlet, geometry, element count, outlet, and approved material.
- Application tip. Confirm any extension or needle does not create an untested restriction.
Pressure release deserves a separate check. Some tools retract or unload the plunger when the trigger is released; others leave more residual load. Do not assume “anti-drip” means a zero-flow stop. Watch the bead after release, record the delay and material tail, and decide whether the process needs a different gun, outlet, or operating method.
Need a gun matched to an existing cartridge?
Send the cartridge system, volume, volumetric ratio, adhesive data sheet, mixer, and expected work cycle. Haijing can identify a sample configuration for fit and material-loaded approval.
Convert the Process Into a Specification
A useful RFQ describes the application without asking the supplier to guess. State the cartridge already approved, the volumetric ratio, and the material. Add the bead or shot requirement, the work pattern, available utilities, and any access limits. A gun quotation should answer that record with one defined configuration.
Keep performance claims testable. “Easy to use” cannot be accepted or rejected. “The operator can complete the planned cartridge and bead sequence without a stall, cartridge movement, or unacceptable hand effort” can be observed. If operator force needs a numeric limit, the buyer must define the method and acceptance value.
Put these fields on the RFQ:
- Cartridge identity. Supplier, system, part number, nominal volume, chamber layout, and flange dimensions.
- Ratio identity. Volumetric ratio plus the adhesive maker’s product and component designation.
- Flow path. Mixer part number, outlet or tip, target bead or shot, and any extension.
- Operating context. Material temperature range, cycle pattern, work position, and available air or charging access.
- Required evidence. Drawing, model code, parts list, sample report, inspection record, and change-control rule.
- Commercial release. Sample quantity, order quantity, packaging, lead time, and acceptable substitutions.
Do not accept an unspecified substitution clause. If the supplier can change the retainer, push plate, seal, or drive mechanism without notice, the sample approval loses value. Require written approval before a component or model revision enters production orders.
Approve the Gun With Your Material
Bench approval must use the production cartridge, mixer, and adhesive. An empty fit check catches geometry problems, but it cannot reveal flow resistance, restart behavior, leakage, or operator effort. A water or oil substitute can also produce a false pass because its flow behavior differs from the adhesive.
Run the test in a fixed order so a failure has a clear cause. Inspect and photograph the empty assembly first. Load the cartridge, install the approved mixer, and purge according to the adhesive maker’s instructions. Record the first acceptable output, complete the planned beads or shots, pause for the process-defined time, then restart and inspect the result.
| Test Stage | Record | Stop Condition |
|---|---|---|
| Empty fit | Seating, retainer, rod alignment | Forced closure or off-center contact |
| Initial purge | Both components, purge method | One side absent or delayed |
| Working cycle | Bead, shot count, operator notes | Stall, movement, leakage |
| Trigger release | Tail, drip, residual movement | Uncontrolled material after release |
| Restart | Pause time, first output, cure evidence | Blockage, streaks, abnormal output |
| End of cartridge | Piston travel and retained material | Unequal travel or package damage |
Approval belongs to the exact configuration tested. Keep the signed sample record and, when practical, a retained tool or photographed reference set. The document should identify who approved the setup, the date, the material batch, and every controlled component. That record protects both buyer and supplier when a later lot behaves differently.
Plan MOQ, Samples, and Lead Time
Commercial terms should follow technical screening, not replace it. Haijing’s documented minimum order for 50, 75, and 100 ml dispensing guns is 50 pieces. The documented minimum for 200, 400, and 490 ml guns is 10 pieces. Confirm any 600 ml or custom configuration in the quotation because it is not covered by those two published MOQ rows.
Samples are not subject to the bulk MOQ. The buyer pays the sample charge and freight, and the documented sample lead time is 3 to 7 days. The current Product Bible records a 1 to 2 week production lead time for dispensing guns. Both schedules begin only after the exact model and order requirements are agreed.
Translate the documented terms into purchase controls:
- Small-format guns: plan a 50-piece MOQ for 50, 75, and 100 ml models, with each ratio identified.
- Larger guns: plan a 10-piece MOQ for 200, 400, and 490 ml models, with system and retainer fixed.
- Samples: no bulk MOQ applies; the buyer pays sample and freight charges.
- Timing: freeze the configuration before using the 3-7 day sample or 1-2 week production lead time.
A distributor ordering several ratios should list each model as a separate controlled SKU. Mixed cartons need a packing list that preserves that identity. The bodies may look alike, so a label and part-number check at receiving is more reliable than sorting by color or outline.
Ask what evidence ships with the order. A dimensional or functional inspection record, model labels, and lot traceability make receiving faster. Haijing’s broader manufacturing base includes a 20,000 sqm ISO 9001:2015-certified facility and more than 60 injection-molding machines. Those company facts support supplier capability, but the buyer still needs product-level acceptance evidence for the gun order.
Diagnose the Most Common Selection Failures
A problem that appears during dispensing often began in selection. The response should follow the physical chain rather than jumping to a stronger tool. Stop, unload pressure safely, and inspect the easiest causes first.
| Symptom | First Checks | Do Not Assume |
|---|---|---|
| Cartridge will not seat | System, flange, retainer, volume | Same volume means same fit |
| One piston starts late | Plunger geometry, rod alignment, piston | The mixer will correct the ratio |
| Trigger effort rises | Outlet, cured mixer, temperature, seals | The gun needs more thrust |
| Cartridge moves in frame | Retainer lock and flange support | Operator grip can stabilize it |
| Material flows after release | Residual load, release action, outlet | Every anti-drip claim means zero tail |
| Package leaks | Seal, alignment, restriction, damage | Higher force is a safe fix |
If the cartridge does not seat, do not grind or bend the retainer. That change removes the supplier’s controlled geometry and can let the cartridge shift under load. Order the correct configuration or a documented conversion part.
If force rises during a run, replace a clogged mixer only after following the adhesive maker’s handling rules. A fresh mixer that restores flow points to the outlet path, not the gun. A continued stall requires inspection of the cartridge, seals, temperature, and drive.
If one piston advances differently, stop the cure evaluation. The sample is no longer proving the intended ratio. Check the plunger set and cartridge pistons, then restart with a documented configuration and a new mixer.
Use the Final Selection Checklist
The release checklist should be short enough to use and strict enough to block an incomplete order. A buyer can copy the following sequence into an RFQ or sample-approval form.
Release the adhesive dispensing gun only when every answer is yes:
- Package defined. The cartridge system, part number, volume, flange, and outlet are recorded.
- Ratio defined. The volumetric ratio and matching plunger configuration are identified.
- Flow path defined. The adhesive, mixer, outlet, and temperature conditions match the test.
- Drive justified. Manual, pneumatic, or electric drive fits the work pattern and available utilities.
- Force supported. Manufacturer data and a material-loaded trial show acceptable operation.
- Sample passed. Fit, purge, bead, release, restart, and end-of-cartridge checks are signed.
- Order controlled. Model code, parts, labels, inspection evidence, MOQ, lead time, and change control are written.
Any “no” points to a missing input, not a reason to accept a vague supplier assurance. Close that gap before the purchase order. The completed record becomes the reference for receiving inspection, operator training, and future replacement orders.
For the product side of the decision, review Haijing’s manual dispensing guns. If cartridge identity is still uncertain, use the adhesive cartridge systems page before requesting a sample.
Why We Publish This Selection Guide
Haijing manufactures adhesive packaging and dispensing components, so our useful contribution is interface control. A product grid can show available gun models. It cannot decide whether a buyer’s cartridge, formulation, mixer, work pattern, and acceptance method form a reliable configuration.
We publish the decision path because fit claims need boundaries. A gun can be correct for one cartridge family and wrong for another at the same volume. A 1:1 body can also require different parts before it supports another ratio. The sample record turns those boundaries into evidence that procurement and engineering can share.
Our position is direct: buy the defined configuration, not the most powerful-looking tool. Freeze the package first, verify force with the real flow path, and keep the signed sample evidence with the part number. That is the shortest route to a repeatable reorder.
References
For epoxy-specific ratio and package checks, use the dual-cartridge epoxy gun selection guide to release the exact plunger, cartridge, mixer, and material trial together.
After choosing an air-powered drive, use the pneumatic dispensing gun setup guide to control the air connection, loaded pressure, cutoff test, restart, and fault-isolation sequence.
Frequently Asked Questions
How do I choose an adhesive dispensing gun?
Match the cartridge system, volume, volumetric ratio, drive, and verified force. Approve the exact gun, cartridge, mixer, and adhesive together in a material-loaded test.
Can one dispensing gun fit different cartridge ratios?
Only when the manufacturer supplies the correct ratio-specific plunger or conversion parts and approves the exact cartridge. A shared gun body does not prove ratio compatibility.
Is a pneumatic gun always better than a manual gun?
No. Pneumatic drive suits repeated cycles with controlled plant air. Manual drive is often the cleaner choice for intermittent work, field use, and locations without utilities.
What causes high trigger force?
Common causes include material viscosity, low temperature, mixer restriction, a blocked outlet, seal friction, misalignment, or insufficient mechanical advantage. Diagnose the flow path before increasing force.
Should I approve a gun without dispensing adhesive?
No. Complete an empty fit check, purge, bead trial, release check, restart test, and operator review using the production cartridge, material, and mixer.